Update Restrictions for Workstations


|
Update Restrictions for Workstations |
|
|
Via Dr.Web Security Control Center you can configure update mode for Dr.Web Enterprise Security Suite at protected workstations in particular time slots. To configure station update mode, perform the following actions: 1.Select the Anti-virus network item in the main menu, in the opened window click the name of a station or group in the hierarchical list. Select Update restrictions in the control menu. 2.In the Update restriction drop-down list, select the limitation mode: •No restrictions—do not restrict distribution of updates on stations. •Forbid all updates—forbid distribution of all updates on stations during time slots that are specified in the Stations update timetable table below. •Update only bases—forbid distribution of updates only for program modules during time slots that are specified in the Stations update timetable table below. Virus bases updates will be performed with no changes in a normal mode. 3.Set the Limit updates traffic flag to limit the network traffic amount during transmitting of updates between Server and Agents. In the Maximal transmission speed (KB/s) field, specify the value of maximal speed for updates transmission. 4.Set the Receive all the latest updates flag to transmit all components updates to the stations not depending on the limitations that are specified in the Detailed Repository Configuration section. If the flag is cleared, station receives only those updates which are marked as current updates for distribution. 5.In the Stations update timetable table, the update mode is specified using the following colors: ■green—update is enabled, ■red—update is disabled. The restrictions are set separately for each 15 minutes of each day of the week. 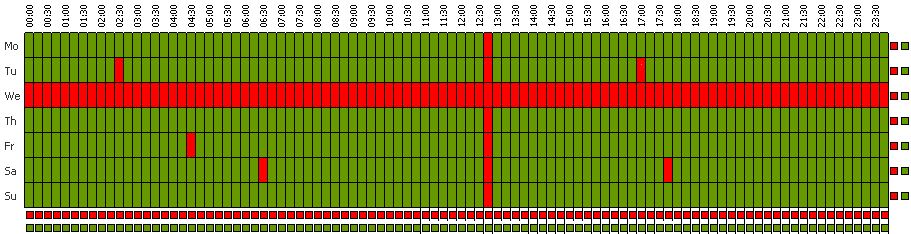 To change the update mode, click the corresponding block of the table: •To change the update mode for a row (full day), click the corresponding color in the right part of the table row. •To change the update mode for a column (a particular 15 minutes interval of each day of the week), click the corresponding color under the table column. 6.After editing, click Save to accept changes. In the toolbar, the following options to manage the section content are also available:
|