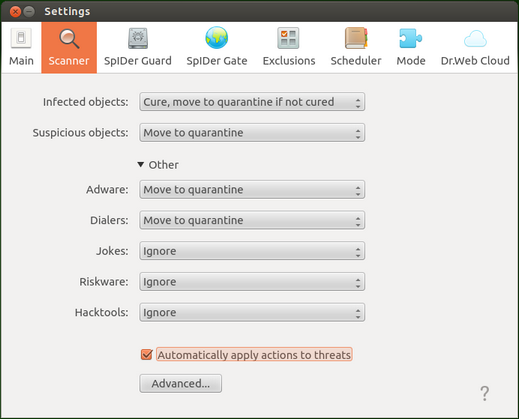
On the Scanner tab, you can specify actions that Dr.Web for Linux applies to threats detected when scanning files on user demand or as scheduled.
Picture 55. Scanner settings tab
In the drop-down lists select an action to be applied by Dr.Web for Linux to a threat of a particular type.
If you want Dr.Web for Linux to apply specified actions to malicious objects immediately upon threat detection, select the Automatically apply actions to threats check box. In this case, the user is notified on a neutralization event and information on the neutralized threat is added to the threat list). If the check box is not set, Scanner adds a detected threat to the list and the user manually selects an action to be applied.
To open a window with advanced scan settings, click the Advanced... button.
In the window with advanced settings, you can configure parameters of Scanner operation, such as:
•Enable or disable scan contents of containers
oArchives
oEmail files
•Set maximum time to scan one file.

Picture 56. Advanced scan settings
|
If check boxes are not selected, containers also will be scanned, but only as whole objects, that is, without analysis of their internal structure. |
Click OK to save the changes and close the window or Cancel to reject them.