|
When using Windows Vista or later operating systems, it is recommended to run Dr.Web Scanner with administrative privileges. Otherwise, all folders and files (including system folders) that are not accessible to an unprivileged user will not be scanned. |
To select a scan mode
1.Click the Dr.Web menu ![]() and select Scanner. The menu of quick access to different scan modes opens.
and select Scanner. The menu of quick access to different scan modes opens.
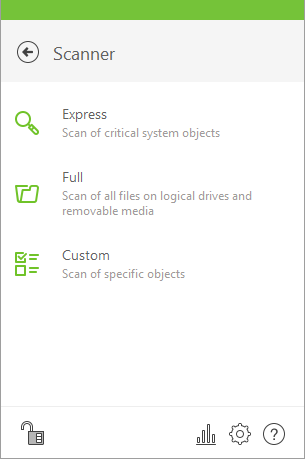
Figure 19. Selecting the scanning mode
2.Select a scan mode you need:
•Custom item to scan only selected objects. The Dr.Web Scanner window opens;
•Express item to scan only critical Windows objects;
•Full to scan all files.
To launch Scanner with default settings to scan a certain file or folder, select Check with Dr.Web in the shortcut menu.
Configuring Dr.Web Scanner
To configure Dr.Web Scanner and its reactions to detected threats, go to Settings → Protection Components → Scanner.
Scan modes
In this mode, Scanner checks the following:
•Boot sectors of all disks
•Random access memory
•Boot disk root folder
•Windows system folder
•User documents folder (“My Documents”)
•Temporary files
•System restore points
•Presence of rootkits (if the process is run with administrative privileges)
|
Scanner does not check archives and email files in this mode. |
In this mode, random access memory and all hard drives (including boot sectors of all disks) are scanned. Moreover, Scanner runs a check for rootkits.
In this mode, you can select objects to be scanned, for example, any files and folders and such objects as random access memory, boot sectors, and so on. To start scanning selected objects, click Start scanning. To select objects, click ![]() .
.
Scan process
When scanning starts, the Pause and Stop buttons become available. During scanning, you can do the following:
•To pause scanning, click Pause. To resume scanning after pause, click Resume.
•To stop scanning, click Stop.
From this window, you can return to the scan mode selection window.
|
The Pause button is not available while processes and RAM are scanned. |