The infected attachments and spam messages can be moved to Dr.Web quarantine, where the malicious objects are isolated from the rest of the system.
On the threat detection in traffic transferred via FTP and HTTP protocols, the infected file is moved to quarantine. If a threat is detected in email transferred via SMTP and POP3 protocols or if it contains spam, the initial email is moved to quarantine (in .msg format) as it came to the sever.
The quarantined objects are located in Dr.Web Quarantine folders in the root directories on the local disk and remain on the disk after Dr.Web for Qbik WinGate is uninstalled. However, the access to these folders is denied. If necessary, you can remove the folders by setting your Windows account as root user (in case NTFS is used).
Enable Quarantine
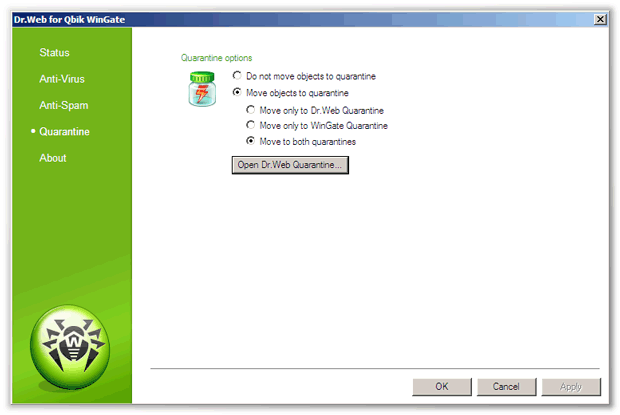
You can enable Dr.Web quarantine as well as the in-built WinGate quarantine by selecting the corresponding options on the Quarantine section (see Figure 6).

Figure 6. Quarantine section
Manage Quarantine
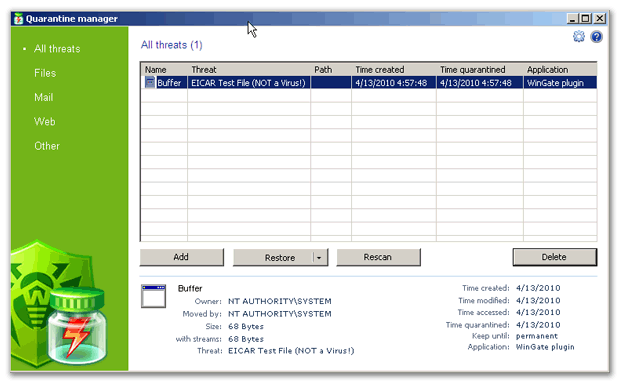
The quarantined files can be reviewed and processed using the special utility Dr.Web Quarantine. To launch the utility, select Start -> Programs -> Dr.Web for Qbik WinGate -> Dr.Web Quarantine. The list of objects in quarantine will be displayed (see Figure 7).

Figure 7. Dr.Web Quarantine
For each object in the list the information on the infected file name and size, the name of the virus and the path to the storage folder is displayed. You can specify the types of the information that is displayed in the list. To do this:
1.Right-click any column in the table and select Customize columns.
2.Select the types of the information you want to be displayed.
Process objects in quarantine
You can remove the quarantined objects or restore them. To do this:
1.Select one or several objects in the list.
3.To delete the selected file(s) click the Delete button.
4.To restore the selected file(s) select Restore -> Restore to and then specify the folder for restored file(s).
You can also scan the quarantined objects, e.g. the suspicious files, again, after updating Dr.Web virus databases. To check the files again, click the Rescan button.
The Add button is used to add files from the local or removable disk to quarantine. Then you can scan these files for viruses.
Quarantine properties
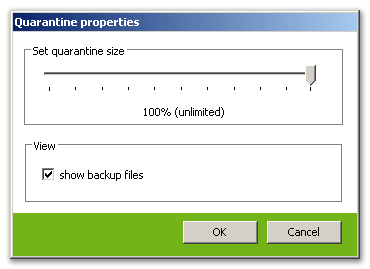
To access to quarantine properties click the Properties ![]() button in the top part of the Quarantine window. In the Quarantine properties window (see Figure 8) you can specify the following settings:
button in the top part of the Quarantine window. In the Quarantine properties window (see Figure 8) you can specify the following settings:

Figure 8. Quarantine properties
1.You can set up the quarantine size. To do this, specify the amount of the disk space for the quarantine in the Set quarantine size section (see Figure 8).
2.Before the infected file is cured, its backup is saved in the quarantine to allow restoring the file in case it is corrupted during its curing. To enable viewing backups in quarantine list, select the show backup files check box in the View section (see Figure 8).