The system administrator may send the users informational messages including:
◆message text;
◆hyperlinks to Internet resources;
◆company logo (or any other graphic presentation);
◆exact date of message receipt in the title of the window.
These messages are displayed on user’s PC as popup windows (see figure below).
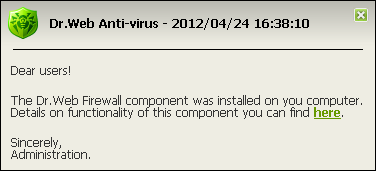
Message window on user’s PC
To send a message to a user
1.Select the Network item in the main menu.
2.Select the workstation or group in the hierarchical list and click the ![]() General →
General → ![]() Send message button on the toolbar.
Send message button on the toolbar.
Fill in the following fields in the opened window:
◆Message text – an obligatory field containing the message itself.
◆Show the company logotype in the message – set this flag, if you want a graphical object to be displayed in the message window title. To load the file of the object from the local resource, click the Browse button to the right of the Logotype file field and select the necessary object in the opened file system explorer.
You can also set the title of the message or the company name in the Name field. This text will be displayed in the message window title (to the right of the logo). If you leave the field blank, a text about the Agent will be displayed in its place instead.
In the URL field, specify the link to an Internet resource, witch opens by clicking the logo (also by clicking the message title, if it will be specified in the Name field).
If the logo is not set or the size of the logo exceeds the allowable limits (see Logo File Format, p. 3), Enterprise Agent logo will be displayed in its place instead.
If the Show the company logotype in the message flag is set, the Use transparency flag will become active. Set the flag, to apply transparency to the logo image (see Logo File Format, p. 4).
◆Show link in the message – set the flag, to use hyperlinks to web resources in messages to users. To insert a link:
1.In the URL field, insert a link to an Internet resource.
2.In the Text field, type the name of the link, a text shown instead of the link in the message.
3.In the Message text field, put the {link} tag in all places where you want the link to appear. In the resulting message the link with the specified parameters will be shown instead of the tag. You may use an unlimited number of {link} tags in a text, all of them having the same parameters (from the URL and Text fields correspondingly).
For example:
To send the message displayed in figure above, the following parameters were set for the link:
Message text:
Dear users!
The Dr.Web Firewall component was installed on you computer. Details on functionality of this component you can find {link}.
Sincerely, Administration. |
URL: http://drweb.com/
Text: here
◆Show delivery status – set the flag, to be notified of message delivery to the user.
A file with graphics (logo) inserted in a message should comply with the following requirements:
1.File graphic format: bmp.
2.Bit depth: any (8 - 24 bit).
3.Maximum size of the visible part of a logo: 120x90 px (width x height). Additional 2x2 px are allowed for a border of transparency pixels (see p. 4), i.e. the full maximum size of an image makes up 122x92 px (see figure below).
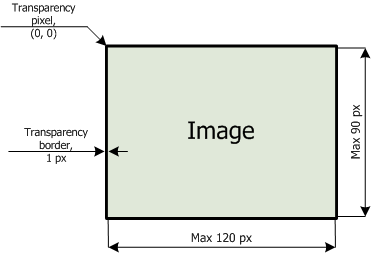
Logo file format
4.In case the Use transparency option was selected when sending a message, the first pixel in the position (0,0) is declared transparent. All pixels of the same color as the initial color of this pixel will become transparent, the window background will be displayed instead.
If you enable the Use transparency option for a rectangular logo, it is recommended to make a rectangular border to avoid erroneous transparency of the pixels of the image itself.
Enabling the Use transparency option will be useful in case of a nonstandard (non-rectangular) form of the logo, helping to remove the undesirable background, which supplements the informative part of the image to a rectangular shape. For example, if the image shown in figure below is used as a logo, the purple background will be removed (become transparent).

Nonstandard form Logo
|
Before sending a message to user(s) (especially to multiple users), it is recommended to send it first to any computer with an installed Agent to check the adequacy of the result. |