The Settings section allows you to adjust some general parameters of the program operation. It is divided into three tabs/sections: Notification protocol , Service account and Black/White Lists. In the Notification protocol tab/section, you can specify and configure the protocol which is used for sending program notifications and also the server from which the notifications will be sent. In the Service account tab/section you can change the parameters of the service account which is used for plug-in administration. In the Black/White Lists tab/section you can create and/or edit the black and white lists for Anti-spam.
Notification protocol
You can select and configure on of the following protocols:
| • | MAPI. To use this protocol, specify the administrator e-mail address and password as well as the name of the server to send notifications from. |
|
If Exchange Server 2007/2010 is used, for sending notifications and reports through MAPI protocol, Microsoft Exchange Server MAPI Client and Collaboration Data Objects package available at Microsoft official web site at http://www.microsoft.com/downloads/details.aspx?FamilyID=E17E7F31-079A-43A9-BFF2-0A110307611E&displaylang=en is required. |
| • | SMTP. To use this protocol, specify the administrator e-mail address and password and also the name of the server and the number of port for sending notifications. |
| • | HTTP. To use this protocol, specify the administrator e-mail address and password, the URL address and the Exchange server version. |
To check the settings of the selected protocol, you can send a test e-mail. In the Test selected configuration group box, specify the parameters of the test message:
| • | E-mail address of message recipient |
| • | Message subject |
| • | Message text |
| • | Attachment |
Click Send test message to send the e-mail.
To save the changes, click Save.
Service account
In this tab/section you can enter the service account UPN (User Principal Name) and password. This account might not necessarily belong to administrator.
Black/White Lists
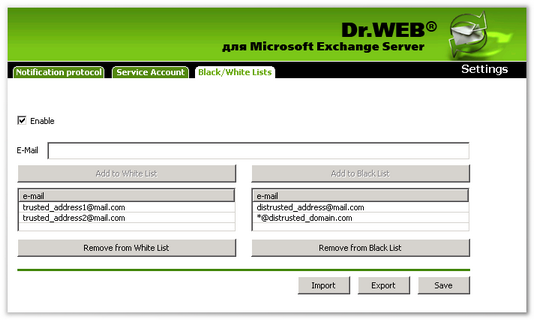
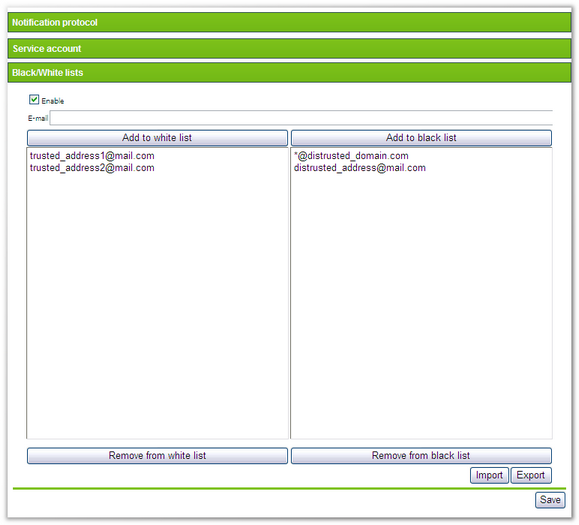
In the Black/White Lists tab/section you can compile lists, which determine the behavior of the Anti-spam component with trusted and distrusted e-mail addresses (see Figures 30, 31).
Figures 30 and 31. Black and white lists
Select Enable to enable the lists. You can add e-mail addresses you trust to the white list. In this case, messages from these addresses will not be checked for spam. If you add an address to the black list, all messages from it will be considered as Certainly spam.
To add an e-mail into one of the lists, enter it in the E-mail field and click Add to white List or Add to black List.
To delete an e-mail, select it in the necessary list and then click Remove from white List or Remove from black List.
You can also use the Import and Export buttons to save the list into a special file with .lst extension or to load the lists from the file and to create or edit the lists manually using a text editor, for example Notepad.
While creating and/or editing the files of black and white lists manually, you need to add prefix to the e-mails: «+» to add the e-mail into the white list, «-» to add the e-mail into the black list, e.g. +trusted_address@mail.com and -distrusted_address@mail.com. The created text file must be saved with .lst extension in Unicode format.
|
You can use the asterisk («*») to substitute a part of the address (e.g. *@domain.org stands for any address in the domain.org domain). |
Click Save when you finish editing the lists.

