Configuring and Forming Groups


|
Configuring and Forming Groups |
|
|
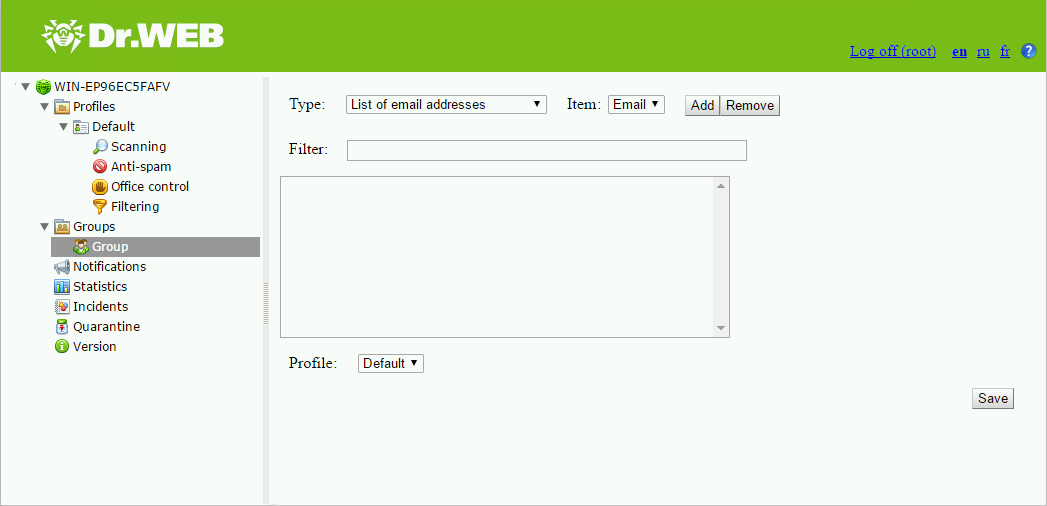
In the information pane that opens by clicking the group name in the administrative console tree (see Figure 13), you can set up the parameters of the selected group, including the manner of forming this group: by listing the email addresses, the IP addresses or selecting the Active Directory groups. Select the group type in the drop-down list Type. Figure 13. Group settings Creating a list of email addresses 1.In the the Type drop-down list, select List of email addresses. 2.To add an email address to the list, click Add. In the new window, enter the email address and click OK. 3.To delete an email address from the list, select it and click Remove, then confirm the deletion of the selected address.
Creating a list of IP addresses 1.In the the Type drop-down list, select List of IP addresses. 2.In the Item list, select the elements type: IP address or IP addresses range. 3.To add an element to the list, click Add. In the new window, depending on the selected elements type, enter the IP address or specify the IP addresses range. Click OK. 4.To delete an element from the list, select it and click Remove, then confirm the deletion of the selected element. Creating a list of Active Directory groups 1.In the the drop-down list Type, select List of Active Directory groups. 2.To add a new group to the list, click Add. In the new window, select the group to add and click OK. 3.To delete a group from the list, select it and click Remove, then confirm the deletion of the selected group.
You can select the profile you want to use for the current group in the Profile drop-down list. When you are done setting up the group parameters, click Save to apply changes. |