On-demand scan of the file system is performed by Dr.Web Scanner. It can execute an express or full scan of the whole file system or scan critical files and folders only.
It is recommended to scan the system periodically, especially if SpIDer Guard has been deactivated for a while. Usually the express scan is sufficient for this purpose.
In the centralized protection mode, Dr.Web Scanner settings may be modified or blocked for compliance with your company security policy or according to the list of purchased services. The scan may start in accordance with a schedule set by network administrator. |
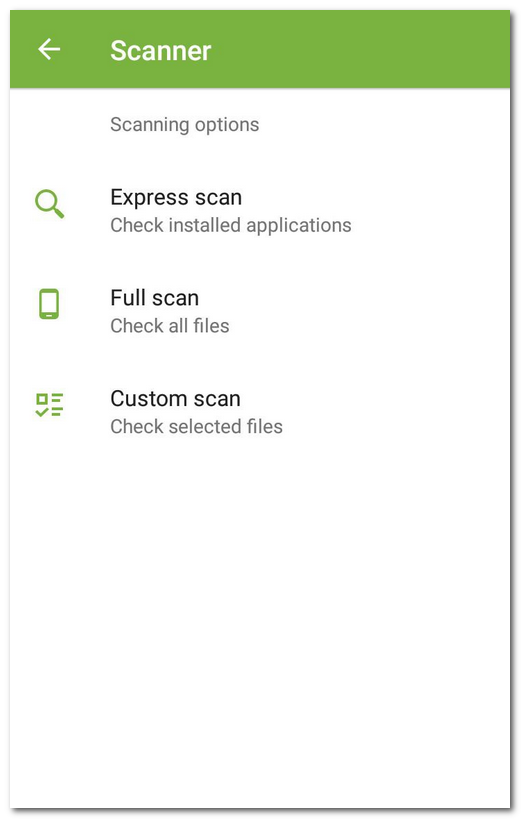
To scan the system, on the Dr.Web main screen, tap Scanner. Then on the Scanner screen (see Figure 14), select one of the following options:
•Express scan. Scan only installed applications.
•Full scan. Scan all system files.
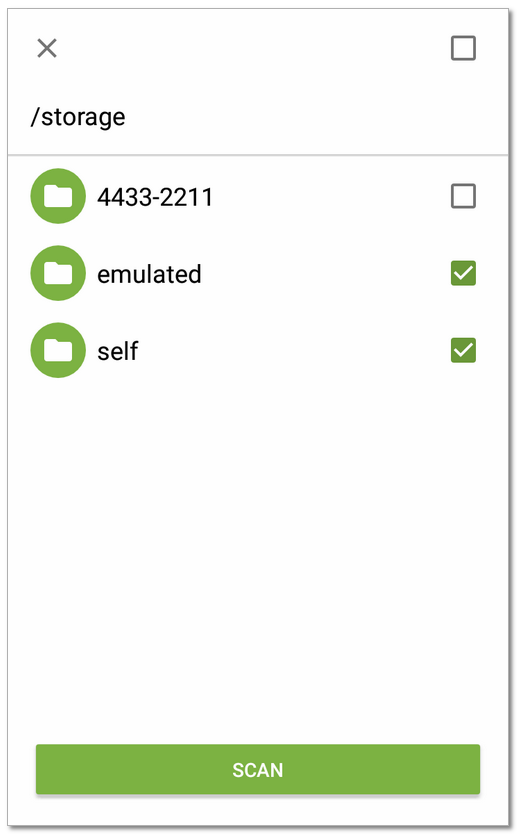
•Custom scan. Scan individual files and folders. You will need to select objects from the list (see Figure 15). To select all objects in the current location, use the check box at the top right. Then tap Scan.
If your device is rooted, you can also scan the /sbin and /data folders located in the root directory.
On devices with Android 11 or 12, to scan the /Android/data and /Android/obb folders, a permission is required for Dr.Web to access these folders.
To grant the permission to access /Android/data or /Android/obb
1.Tap Custom scan.
2.Select the /Android/data or /Android/obb folder on the list of objects.
3.In the dialog window, tap Grant.
4.Tap Use this folder.
On devices with Android 13 or later versions, the /Android/data and /Android/obb folders are system-protected and thus cannot be scanned.
If Dr.Web Scanner detects threats, the ![]() icon appears at the bottom of the scan screen. Tap the icon to open check results (see Figure 16) and neutralize threats. If you switch to another screen or application, you can open check results by tapping the icon on the notification bar.
icon appears at the bottom of the scan screen. Tap the icon to open check results (see Figure 16) and neutralize threats. If you switch to another screen or application, you can open check results by tapping the icon on the notification bar.
Sending suspicious files to the Doctor Web anti-virus laboratory
You can submit suspicious ZIP archives (files with the .jar and .apk extensions) presumably containing viruses, .dex, .odex, .so files, or clean ZIP archives that have been identified as so-called false positives, to the Doctor Web anti-virus laboratory.
To send a file to the laboratory
1.Tap and hold the file in the hierarchical list (see Figure 15), then tap Send to laboratory.
2.On the next screen, enter your email address if you want to receive the results of the file analysis.
3.Select a category for your request:
•Suspicious file if you think that the file is a threat.
•False positive if you think that the file was identified as a threat by mistake.
4.Tap Send.
The Doctor Web anti-virus laboratory accepts files of 250 MB or less. |
To access Dr.Web Scanner settings, open the Settings screen and select Scanner.
•To enable the scanning of files in archives, select the Files in archives check box.
By default, the scanning of archives is disabled. Enabling archive scanning may impact system performance and increase power consumption. Disabling archive scanning does not decrease the protection level because Dr.Web Scanner checks APK installation files even if the Files in archives check box is not selected. |
•To set up actions automatically applied to the detected threats (see the Check Results section), select Actions.
If Dr.Web uses centralized protection mode and connects to the server version 13.00.1 (17-03-2025 03:00:00) or earlier, instead of this option you will see Additional options. |
•To enable/disable detection of files that might threaten your device, tap Additional options and select the corresponding check boxes:
▫Suspicious objects,
▫Adware,
▫Dialers,
▫Joke programs,
▫Riskware,
▫Hacktool programs,
▫Exploitable software.
You can see this option only if Dr.Web uses centralized protection mode and connects to the server version 13.00.1 (17-03-2025 03:00:00) or earlier. In other app versions, Actions appears instead. |
The application registers events related to the operation of Dr.Web Scanner (scan type, check results, and detected threats). All registered actions appear on the Events section on the Statistics tab and are sorted by date (see Statistics).

