The ![]() Filters section in the top-right corner of the screen allows you to create and edit filters used for data search in the report (see Search and Analyze). Filters facilitate data analysis by displaying only relevant information. The Filters section allows you to view, create, and edit filters and filter groups outside the report data analysis (see Figure 5).
Filters section in the top-right corner of the screen allows you to create and edit filters used for data search in the report (see Search and Analyze). Filters facilitate data analysis by displaying only relevant information. The Filters section allows you to view, create, and edit filters and filter groups outside the report data analysis (see Figure 5).
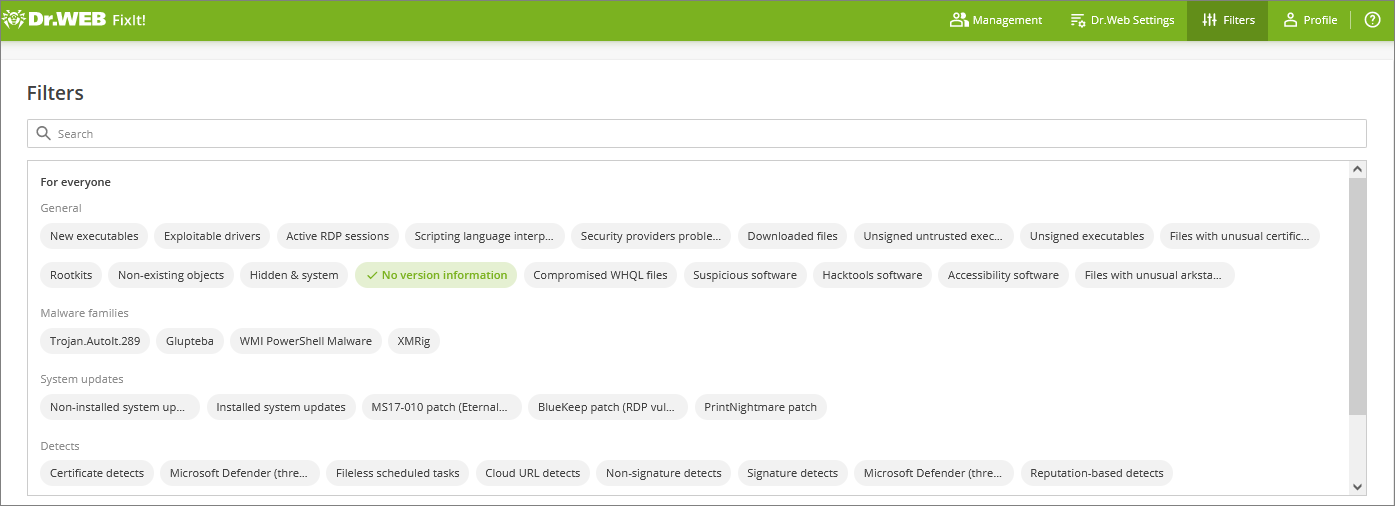
Figure 5. Filters
Administrators can create, edit, and remove any filters, including the preinstalled ones. Managers and users can create, edit, and remove filters created in the space to which they belong.
A filter consists of:
•A query, which is used for searching across data. A query consists of arguments (that is, categories of objects you are searching for) and their values (that is, parameters of objects that belong to categories).
•Fields, which define what data is displayed in the search results. One filter can include multiple fields, separated by commas.
You can make a filter visible to other service users or only to you. The following access options are available:
•All users—this option is available only for administrators. The filter will be visible to all service members.
•This space—the option is available only for managers and users. The filter will be visible to all space members.
•Only me—option available for all service members. The filter will be visible only to the member who created it.
1.Fill in Query and Fields.
2.Fill in Name and Description.
3.In the Available for field, select who will see the filter.
4.Select a group or create a new one by clicking ![]() New group.
New group.
5.Click ![]() Save as new filter.
Save as new filter.
|
Administrators can hide data listed in the Query field by using the Hide query toggle button. |
1.Select a filter from the list.
2.Edit the values (see Figure 6).
3.If needed, change filter availability in the Available for field.
4.Select a group or create a new one by clicking ![]() New group.
New group.
5.Click ![]() Save to save changes. To create a new filter, click
Save to save changes. To create a new filter, click ![]() Save as new filter.
Save as new filter.
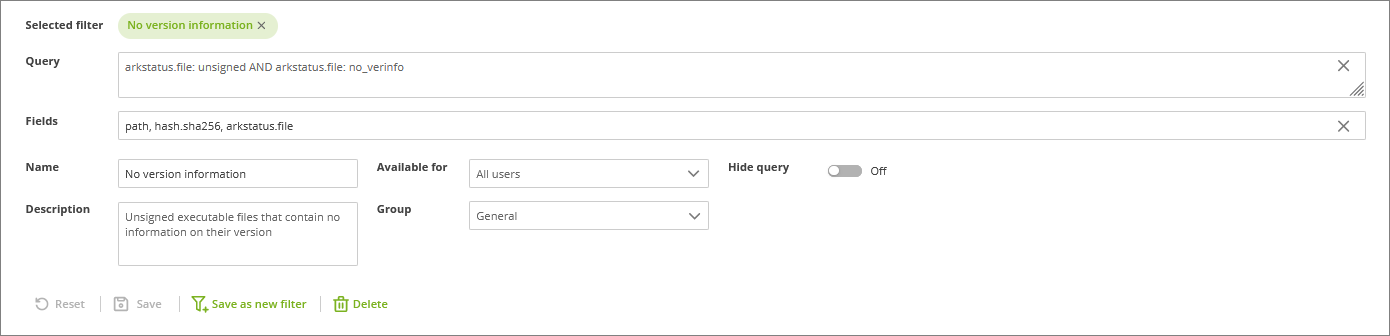
Figure 6. Filter editing
1.Select a filter from the list.
2.Click ![]() Delete.
Delete.
3.Confirm the action in the Delete filter pop-up window.
If a filter was created, edited, or deleted successfully, a notification will appear in the bottom-left corner of the screen. You can cancel filter deletion by clicking the Undo button in the notification.
You can sort the created filters into groups. If you did not select a group when creating a filter, it will be automatically saved to No group. A new group can be created only when editing a filter on the Filters tab or when creating a filter on the Filters or Search and Analyze tabs.
The Filters tab also allows you to rename and remove filter groups.
To rename a group
1.Hover over the group name that you want to rename.
2.Click ![]() next to the group name.
next to the group name.
3.Enter the new name in the pop-up Edit group window.
4.Click Save.
|
This option is not available for No group. |
To delete a group
1.Hover over the group name that you want to delete.
2.Click ![]() next to the group name.
next to the group name.
3.Confirm the action in the Delete group pop-up window.
|
When deleting a group, you also delete all the filters in it. A deleted filter group can not be recovered.
This option is not available for No group. |