Here we will study how we used Dr.Web FixIt! to find and cure the Trojan.AutoIt.289 malware on a user’s computer.
Stated Problem
A user was concerned that for an unknown reason, they could not open the website of an anti-virus product to activate a trial version.
We used Dr.Web FixIt! to look into the issue.
Solution
As usual, we started by going through our standard preparation steps:
•created a task
•generated the analyzing tool
•sent the tool to the user
•uploaded the report on the state of the system
We will not describe those steps in detail here, because they are simple and always the same. You can read more about them in the Task section.
Working with Report
The main event started when we received the report with the system analysis.
We went to the Search and analyze tab of the report to start by filtering out malicious and suspicious files.
We selected the following filters from the General group:
•Downloaded files
•Scripting language interpreters
•New executables
•Rootkits
•Unsigned executables
•Files with unusual arkstatus
•Suspicious software
•Hacktools software
•Files with unusual certificates
the following filters from the Detects group:
•Cloud URL detects
•Non-signature detects
•Signature detects
•Reputation-based detects
and the filter from the Heuristics group:
•Unsigned untrusted executables
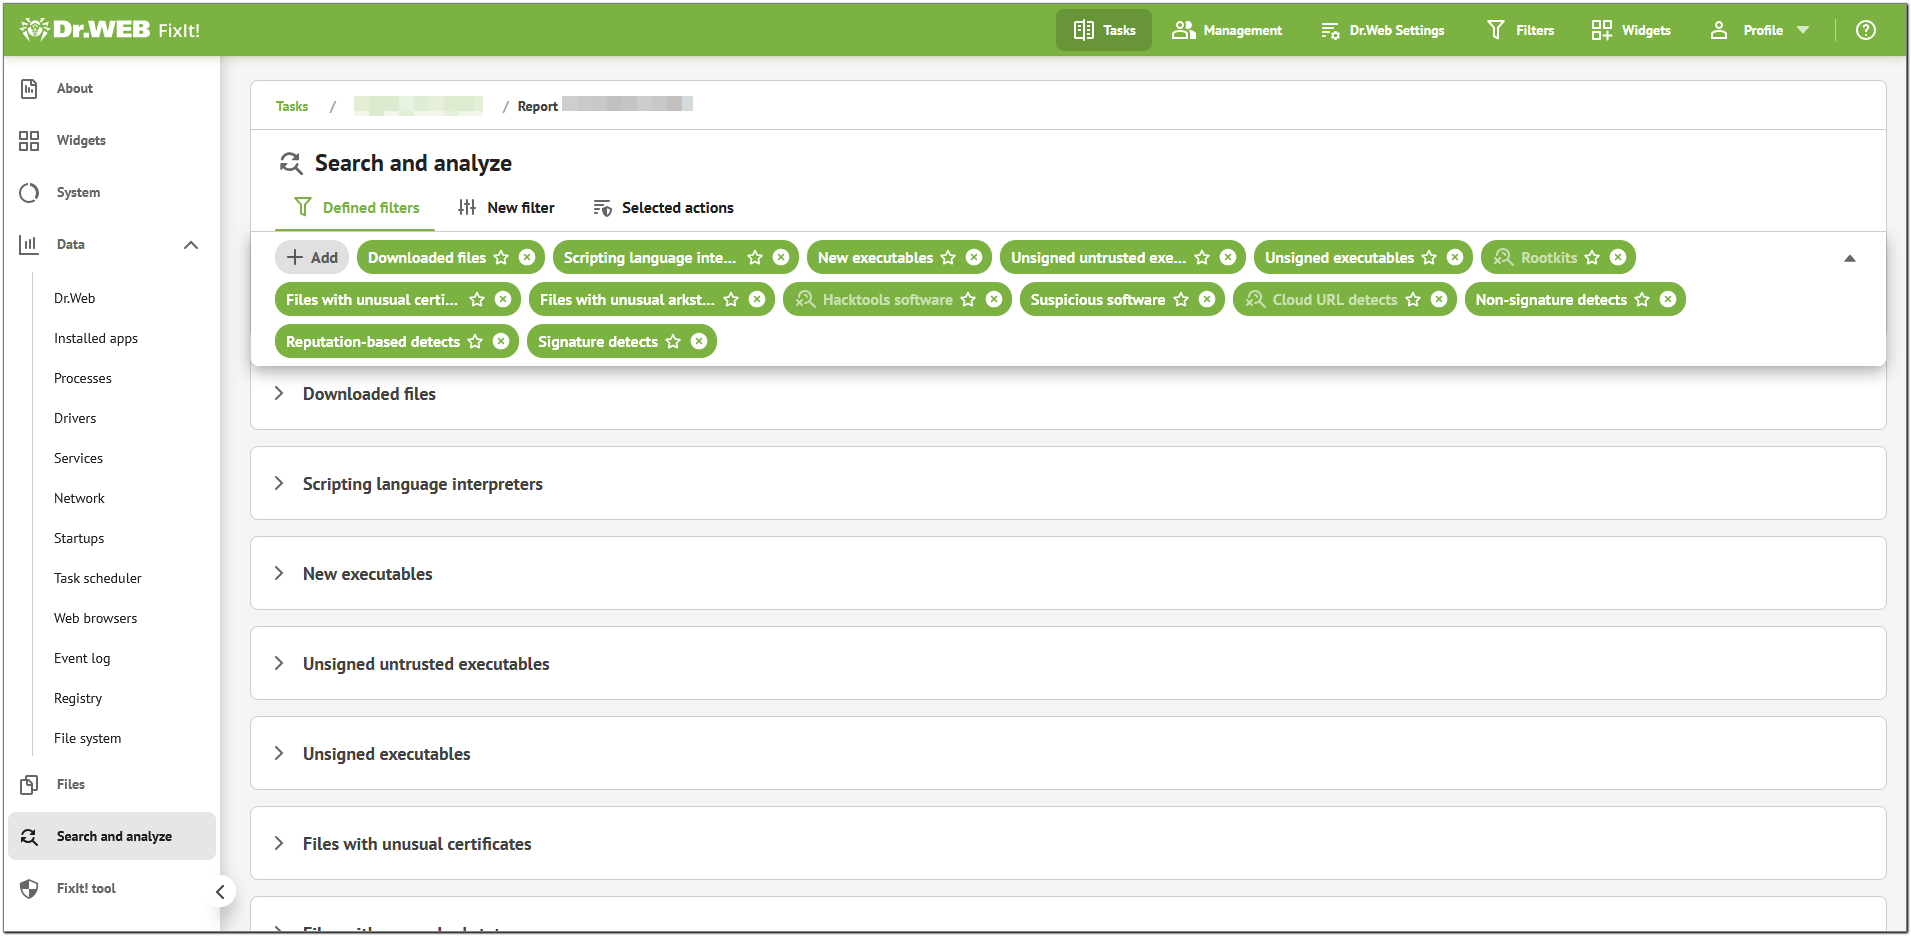
Figure 18. Selected filters
This is a standard set of filters that can help you find the majority of threats.
General filters are heuristic. We use them to look for unsigned, hidden, and generally suspicious files. If a file is detected by one of those filters, it does not automatically mean that the file is malicious, but if we add information from other filters, then we are able to draw conclusions.
Filters in the Detects section, as the name suggests, help us look for detectable malicious files. It greatly helps narrow the search from the start, so we started the analysis from there.
After a bit of looking around, we found a likely suspect amongst the Reputation-based detects. This filter displays verdicts from Doctor Web’s Metawave reputation database, that is, files that were at some point detected as infected, suspicious, coming from a suspicious vendor, or clean.

Figure 19. Reputation-based detects
It showed us several files labeled as infected, including the widely known xmrig-cuda.dll malicious library, but our biggest find was the file C:\ProgramData\RealtekHD\taskhostw.exe, the signature move of Trojan.AutoIt.289. As soon as we saw it, we knew that the user’s computer was infected by this trojan.
Considering that Trojan.AutoIt.289 tends to come up often in our work, FixIt! has a specialized filter for it. We selected it to find all affected files and processes.
The Trojan.AutoIt.289 Filter
The Trojan.AutoIt.289 filter displays files, processes, and startup elements affected by this trojan.
We selected this filter on the Defined filters tab and expanded the table to view results.
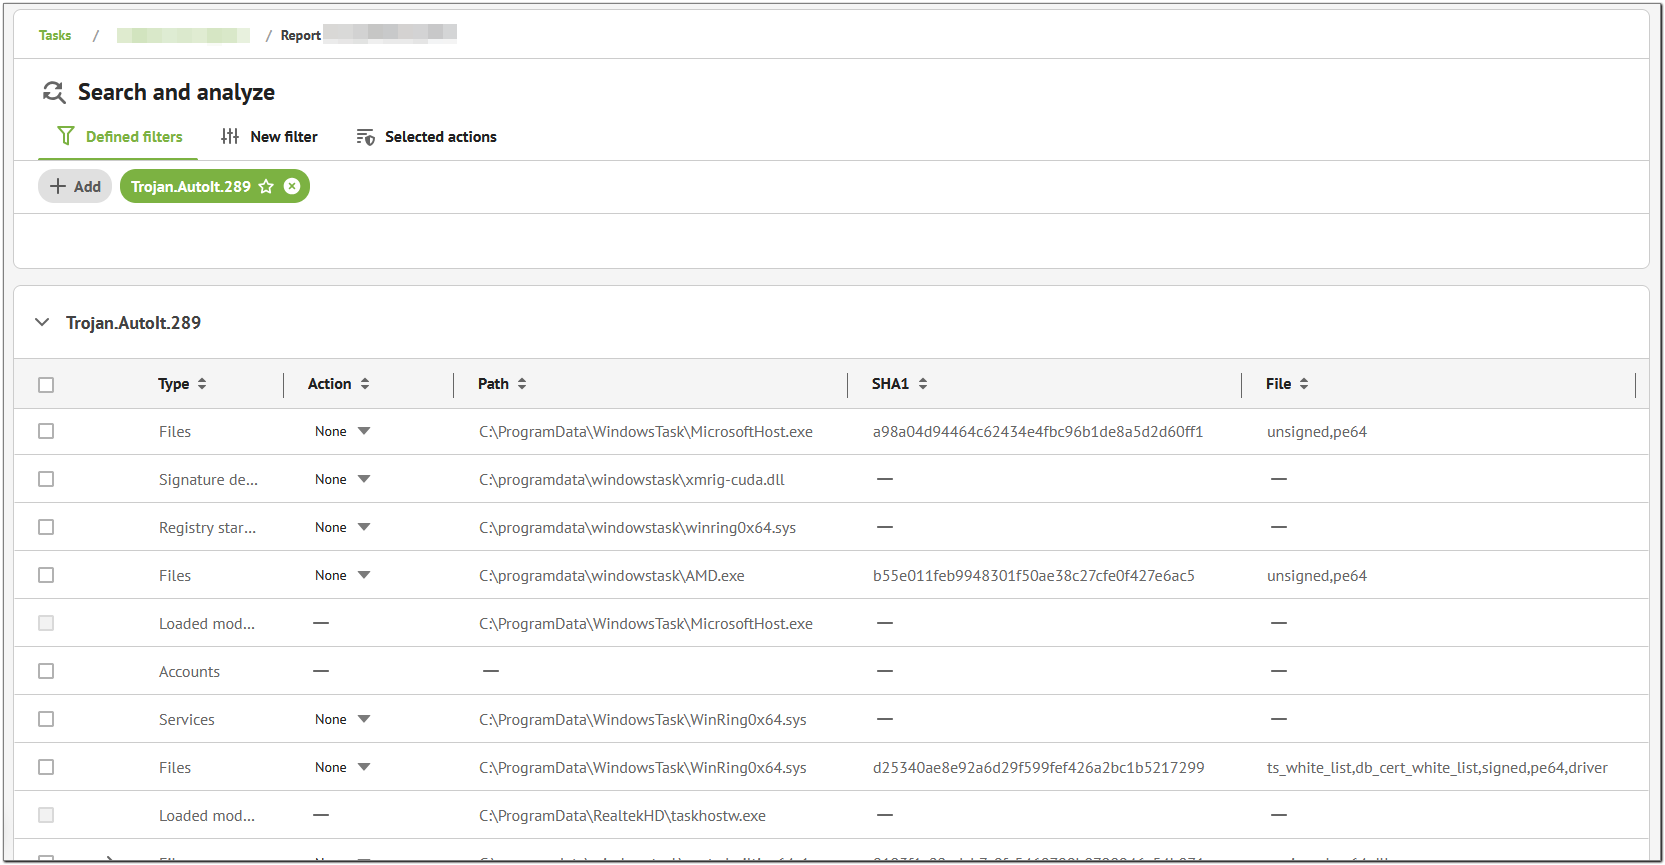
Figure 20. The Trojan.AutoIt.289 filter
All we had to do next was to select an action for each element.
Curing
Actions vary for different element types. To group elements together, we selected the checkbox above the entire column. Note that only elements with available actions were selected (for instance, loaded modules have no action and they were not selected).
Then, we selected element types in the drop-down menu above the table and the respective action for each element, one by one.
For instance, for the Processes element type, we selected Kill, and it was applied to each element of this type.

Figure 21. Selecting actions for a file
Then we did the same for other element types, selecting for them Cure, Delete, and Disinfect, respectively.
Selected actions went on the Selected Actions tab for us to review.
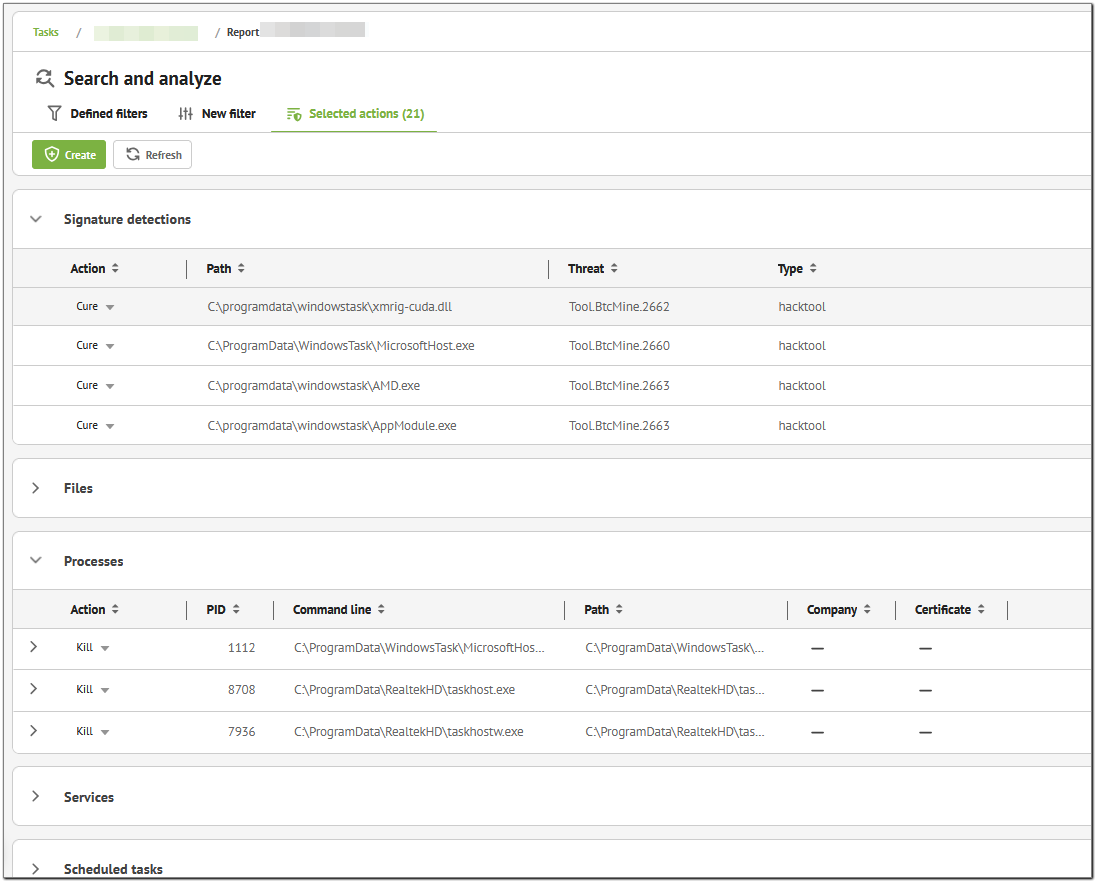
Figure 22. Selected actions
When we made sure that all required actions were properly saved, we clicked Create to generate a curing tool for the user.
Before creating the tool, FixIt! allowed us to review the script and add or edit commands manually as needed.
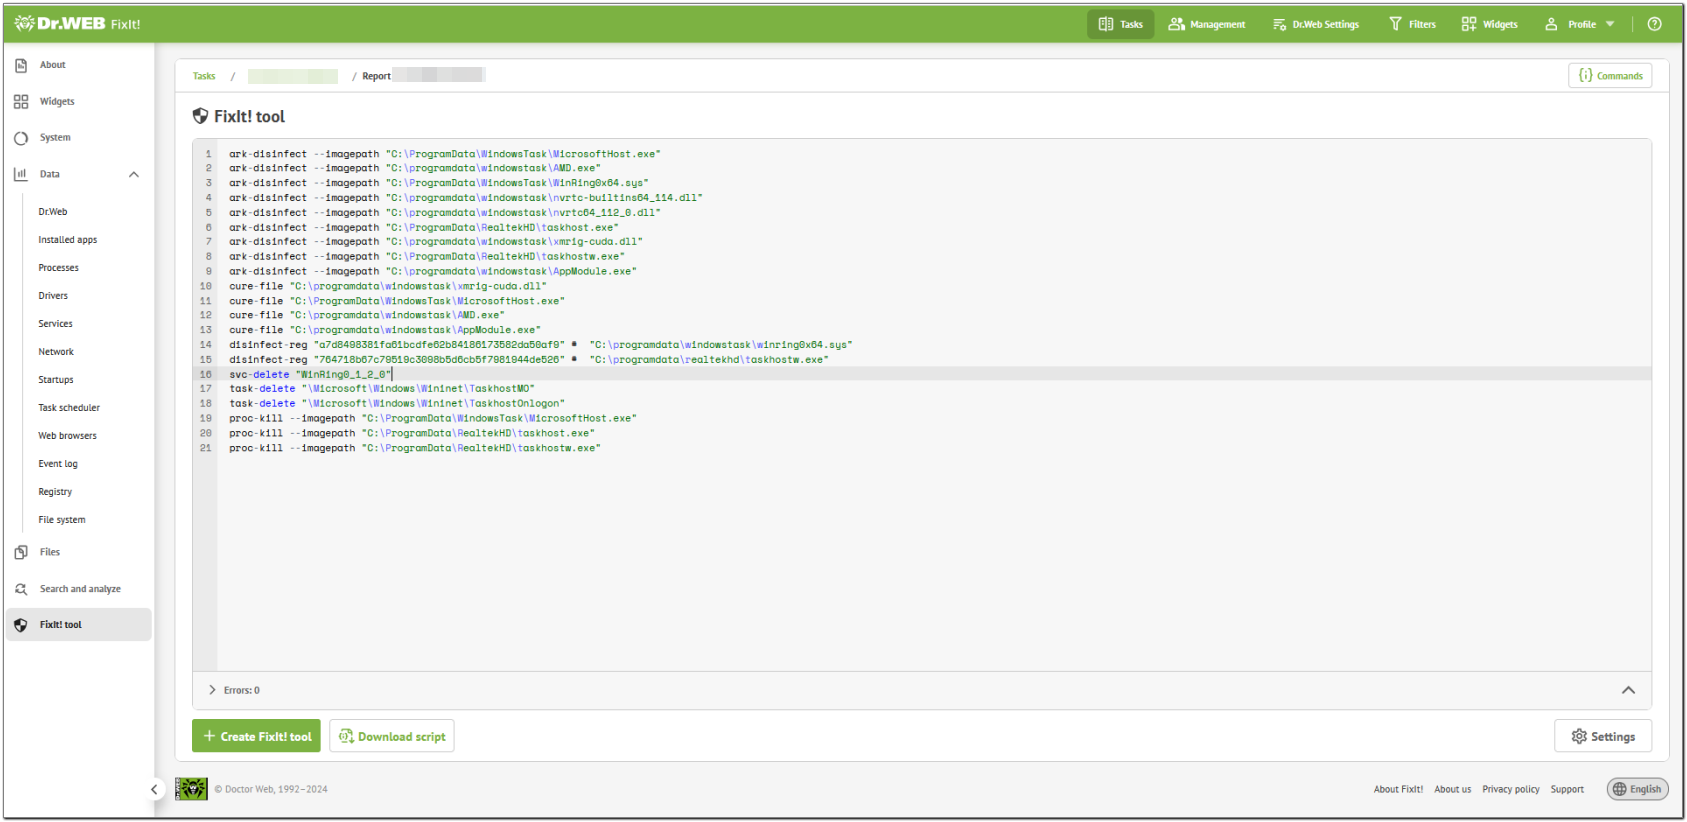
Figure 23. The resulting script
Optimizing
Although the script above is fully functional and able to solve the issues it was created for, an advanced FixIt! user can still optimize it, either when selecting actions or when reviewing the script.
What we found:
•Logically, the proc-kill commands should be placed in the script first, because all commands but the -inspect ones are run in the order of the script, and we have to kill the trojan’s processes before we can cure the computer.
•When run, the cure-file and ark-disinfect commands kill the corresponding processes and remove startup elements, that is, all the other commands that do the same with the same objects can be safely removed from the script.
•The cure-file and ark-disinfect commands give essentially the same results when applied to the same object. In our case, some objects were detected both as Signature detections and Files, so that two kinds of actions could be applied to them, which we did before checking thoroughly whether it was necessary.
When we deleted all redundant commands from the script, it looked like the following.
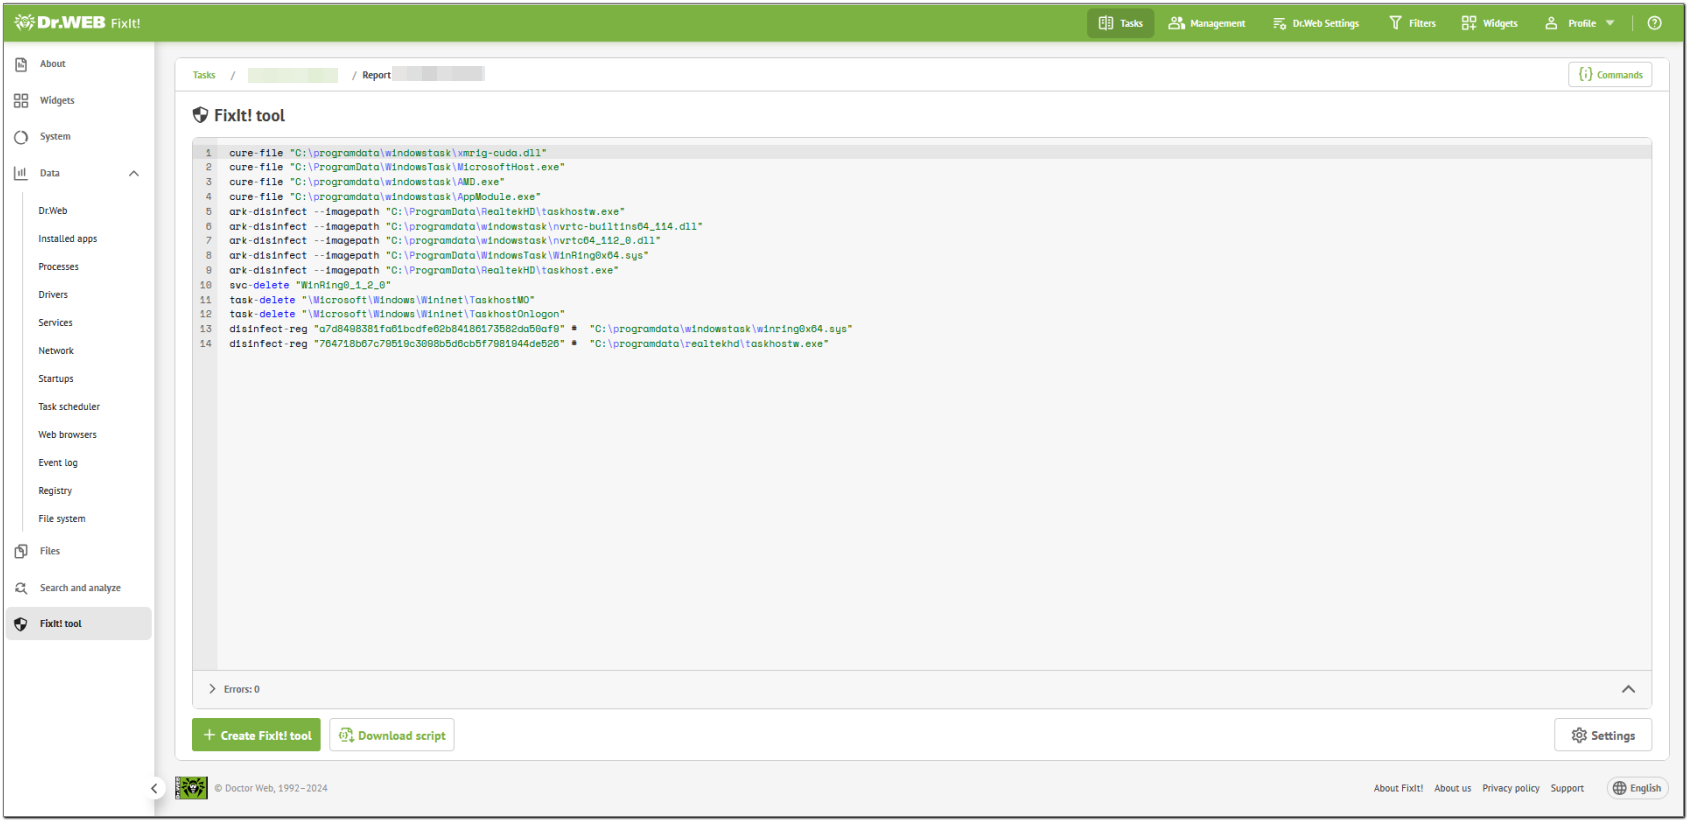
Figure 24. The optimized script
By pressing Create once again we generated the final version of our FixIt! curing tool and sent it to the user.
Result
After the user run the tool, we used the Compare reports feature to compare the resulting report with the previous one and made sure nothing suspicious was left on the affected computer.